|
|
 發表於 20-8-2009 21:19:57
|
顯示全部樓層
This post is a bit too long, but hope you guys like it ^_____^ enjoy~~~~
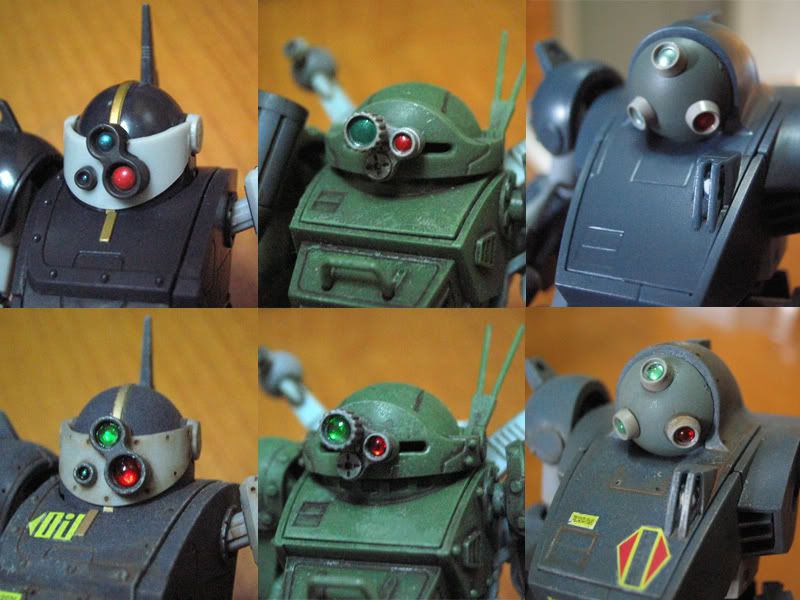
Recently added the arouma lens onto the 1/48 dogs, the images on the top are the ones without modification.
The ones on the bottom are with those arouma lens. I've used 2 different types of arouma lens here
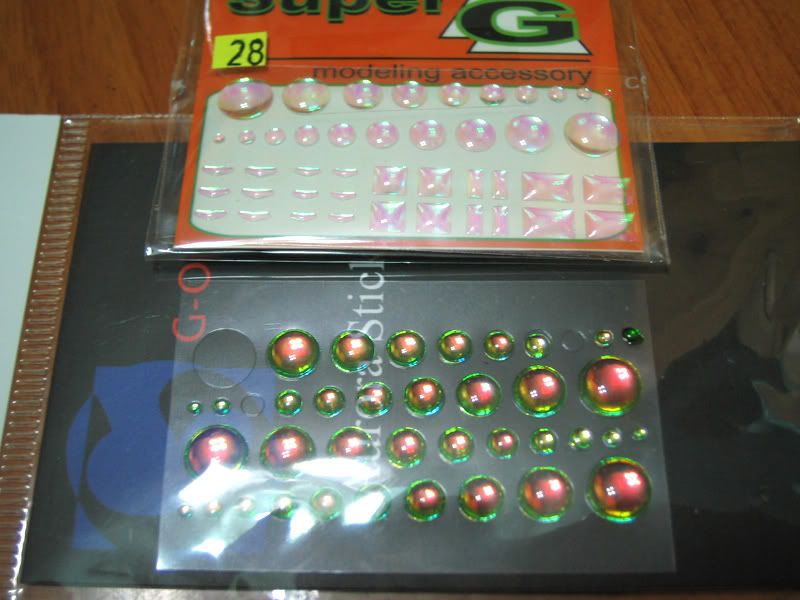
Lens type 1 - comes in 2 colours, each pack (each colour) include different sizes, it's kinda soft and transparent:
(I used the green ones on the green lens of the 1/48 ones)
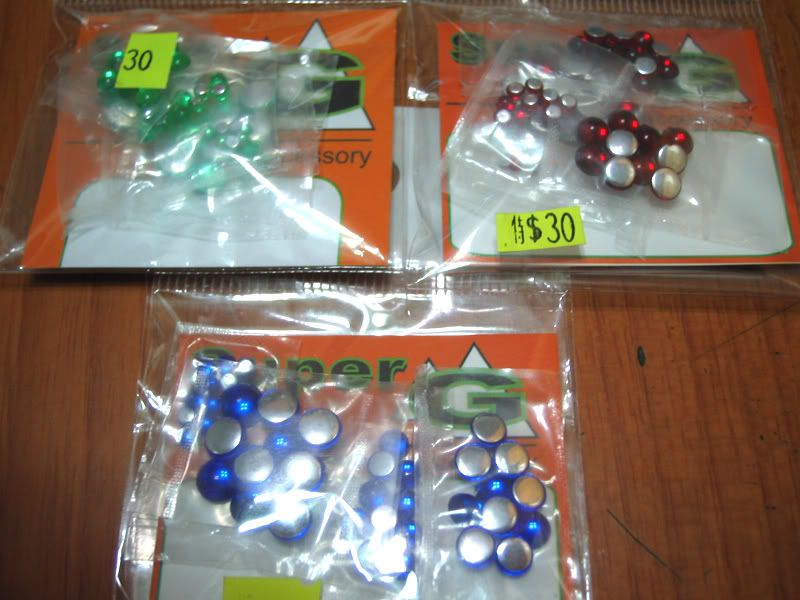
Lens type 2 - comes in 3 colours, each pack (each colour) include 5 different sizes, it's hard and with metal on back:
(I used the red ones on the red lens of the 1/48 ones)
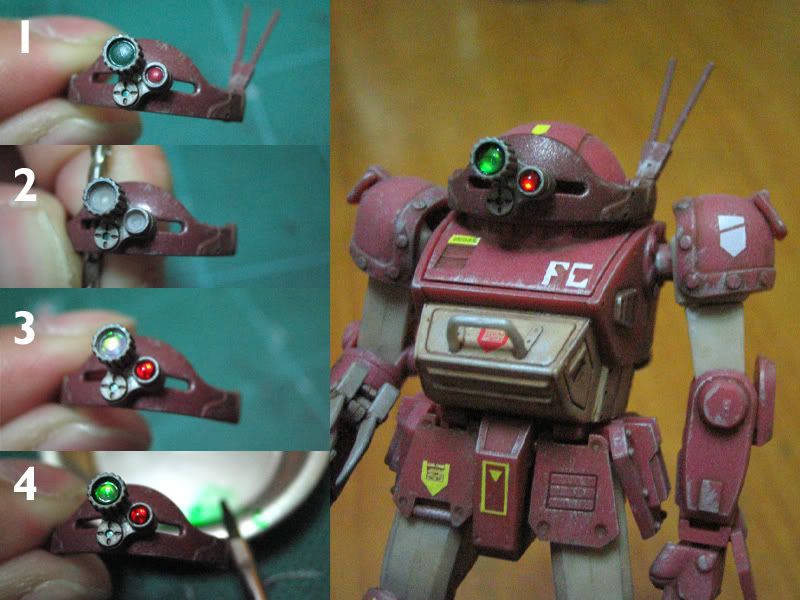
Here are the steps I modified and applied these lens:
1 - original "lens" looks dead~~
2 - use drill to "damage" the original eye (cos I think it looks better that the lens dont stick out too much)
3 - stick the arouma lens into the holes (lens type 1 is ahnesive on the back; I use blu-tack to stick lens type 2)
4 - paint lens type 1 with clear green (cos I think the original colour of lens type 1 is too pale)
You can see that type 1 without the metal back is still very bright and reflective comparing to type 2
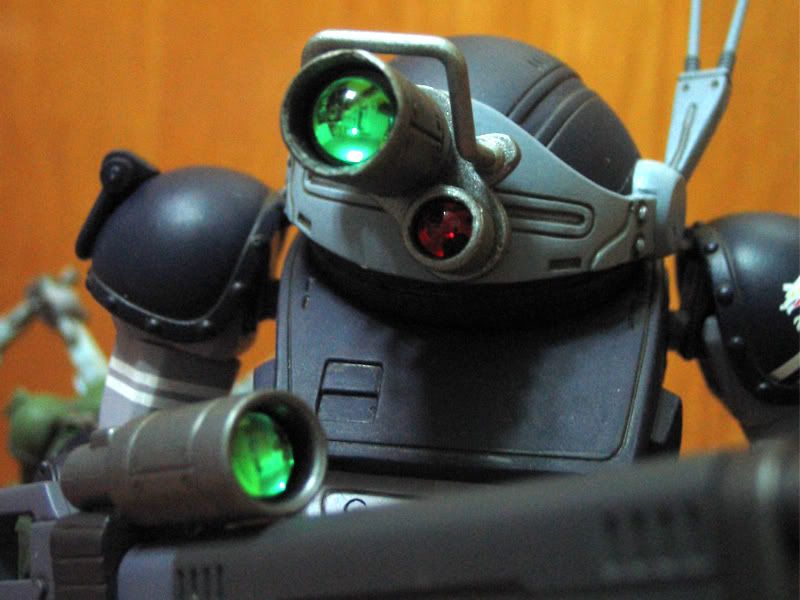
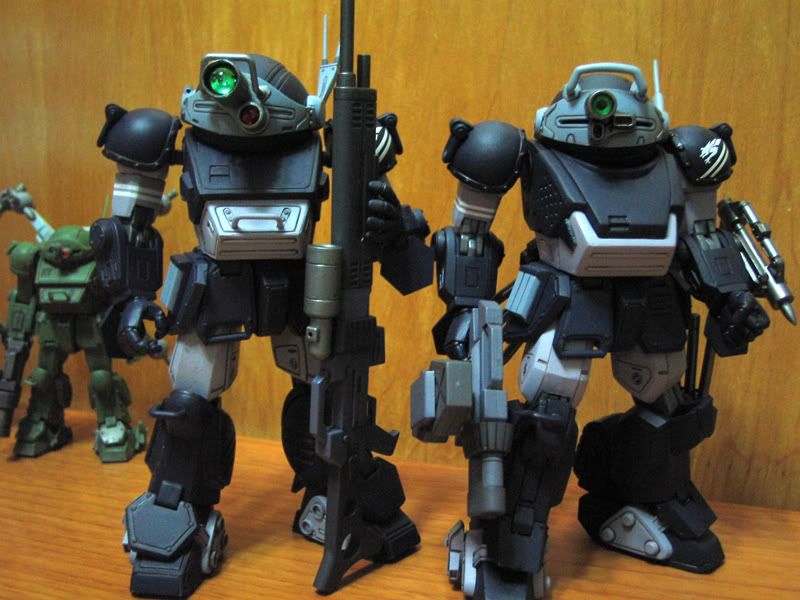
Besides 1/48, I've also applied arouma lens on 1/35 MAX dog. This time, I used Lens type 2 on both green and red.
The original lens is very mat and shit in form, so I used drill and screw driver to take out the original lens on the head and the gun.
By comparing to the Scopedog Assault, the lens are really reflective and bright (and huge too, hahaha~~)
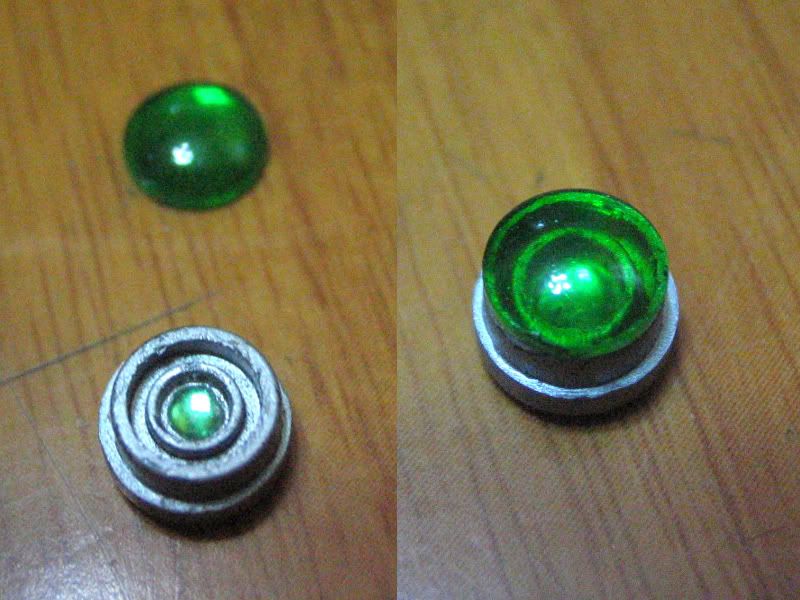
Originally I was thinking to modify the lens using parts like these, to make it more detailed, but finally chose Lens type 2
The lens part is from WAVE, the detailed parts underneath are from Kotobukiya, and I added one small Lens type 1 in the centre.
This would look much more detailed, but not as bright as Lens type 2
[ 本帖最後由 ikkithefool 於 20-8-2009 09:23 PM 編輯 ] |
|